Dixie George- Specialist Practice
Making a Fibreglass Core
Stuart Bray - UMA 2015 Demo Tutorials
Step 1
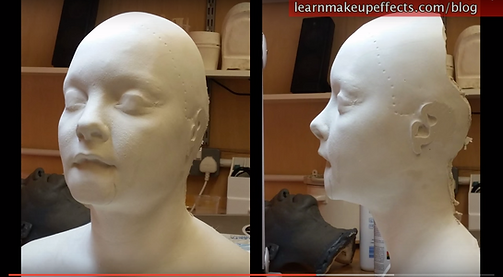
The first thing to do with life casts is clean them up and remove any undercuts that might cause problems. In this tutorial you can see how Stuart bray has carved in the nostrils, removed the ears, drilled in the hairline and removed the eyelids.


Step 2
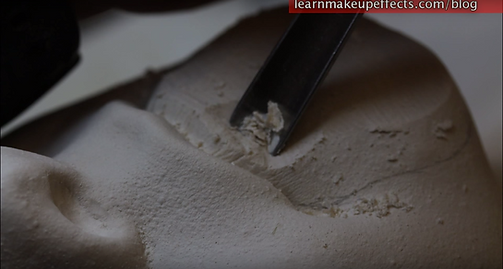
For this makeup Stuart Bray needed the appliances to and inside the lip. So he modified the plaster core so he could create a separate piece for the chin.
For this he firstly marks on the plaster core where he is going to separate the pieces, then uses rasping tools and smaller chisels to remove the plaster so he can blend the top lip further into the mouth.


Step 3


Step 4
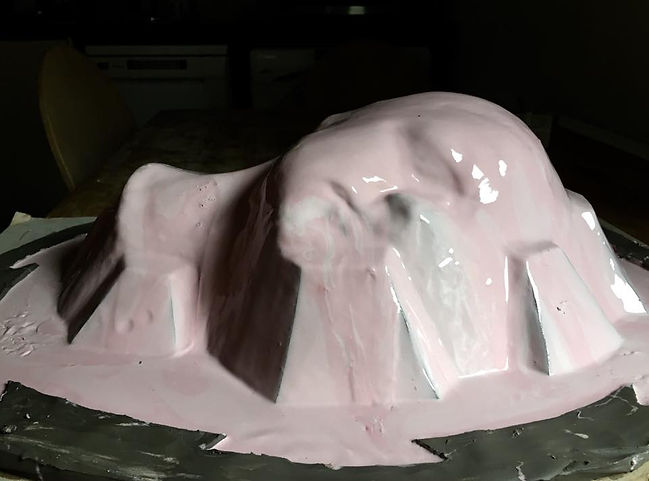
After pouring the first layer of silicone on the cast, you then have to mix up a thicker layer with thixotropic and smooth it onto the cast.
Silicone Keys- the point of these is for the fibreglass or plaster jacket to have something to fix into, so that the silicone wont change shape in the mould. For this mould, Stuart, uses long thing strips of plastic that he pours silicone into and lays upon the mould. This can also be done with ice cube trays.


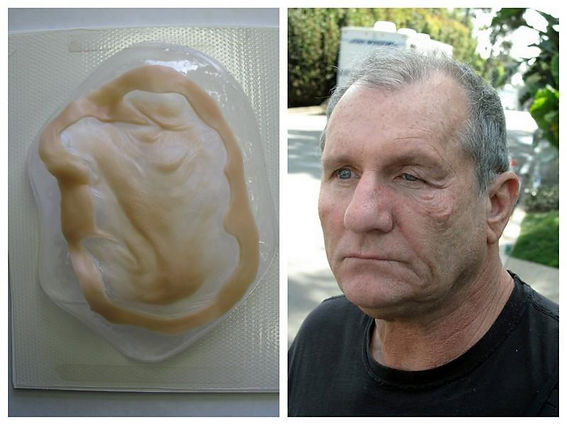
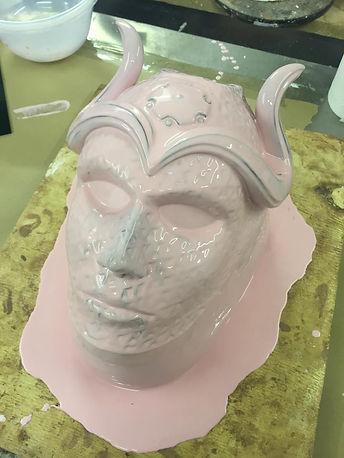
Partial Face Casts
The Ed O'Neil clay up and 1630 positive. Here is some info on 1630 ( http://www.bjbenterprises.com/pdf/TC-1630.pdf ) It's all we use for silicone prosthetics. — at At VVD Effects in Burbank, CA.
The flashed sculpt ( sculpt by Vincent Van Dyke) and the finished 1630 mold. The positive is solid 1630 with a 1/2" thick flange. The negative a 1630 and fiber glass chop mix. — at At VVD Effects in Burbank, CA.
The flashed sculpt ( sculpt by Vincent Van Dyke) and the finished 1630 mold. The positive is solid 1630 with a 1/2" thick flange. The negative a 1630 and fiber glass chop mix. — at At VVD Effects in Burbank, CA.
Examples of partial face casts by Chris Lyons, for reference.
MY CORE PROCESS
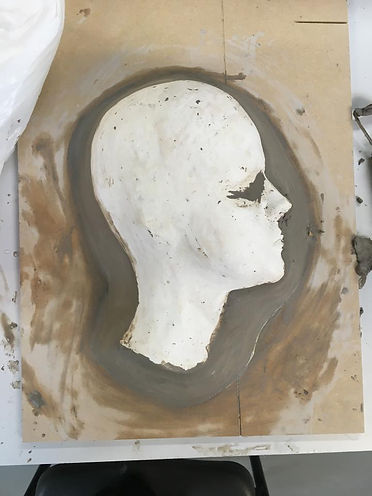


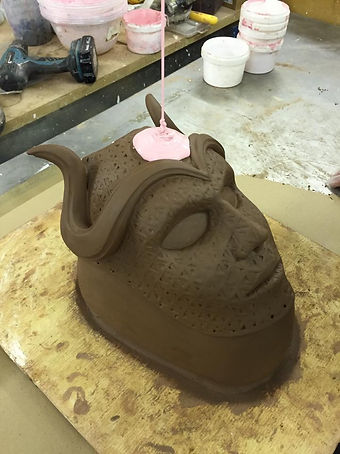
After securing the cast somewhat, I decided to drill holes in the cast where the hairline is because I need to incorporate it into my sculpt. This way the positive fibreglass core will have ridges where the hairline is.
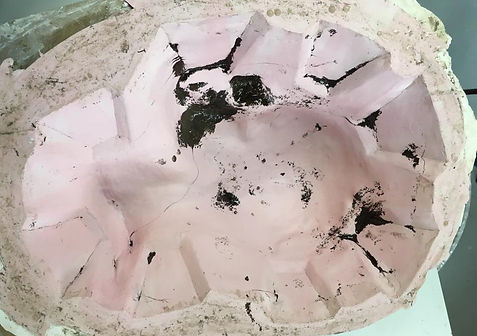
I am really happy with how neat the grounding is, although it took a long time, it is worth doing it well so that there are no undercuts and the mould works better in the long run.
. Although I am basing this moulding process on Stuart Bray's moulding for his UMAE piece, he used a full head and this is only half, I think the whole mould is a little big and in industry and if I re-did it I would shave down the plaster a little more so that the flashing is not so high.
However I my designs are not complete yet, I still need to do some experimentation, I am not sure how much space I will use to sculpt on, I may use only the space around the ear but I may go across the face and probably down the neck, so I wanted to make sure I had enough space to build the flashing on.
What I have learnt from this process-
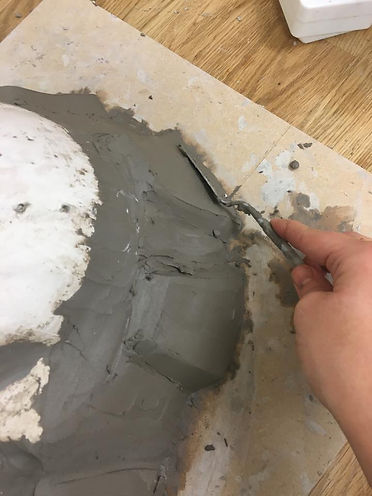
- You can't rush this! is basically the number one thing I learnt when doing this process, it does take a long time, because the wet clay is so soft.
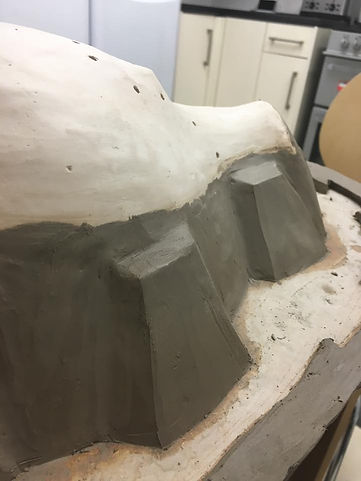
- To Think about undercuts! when building up the wall, I didn’t realise how far out around the head i would actually have to build it. and also to think about the eye and around the mouth and nose because they can cause problems.
- I also realised that it is more time efficient and easier to use wet clay to remove undercuts than to spend ages filing down nostrils and building it up with plaster.
-I have also learnt that I really enjoyed this process, perhaps because it was the first time i have done it. But I found it quite relaxing and rewarding, I thought before that I was not good at mould making, but it just takes practice and the time to do it the right way.
-If I was to redo this mould, I would probably shave down the plaster head a little more and make the flashing more concise. and possibly make more of a snap mould, rather than such a big fibreglass core. But I’m sure it will work either way.
For this project I first researched Stuart Bray's mould making, so this is what I am basing this step on, with similar shaped but more keys, and a large space for flashing.
I spoke to Wayne at creaturegeddon about tools, and he said when he was working at Kristyan Mallett's, everyone was using Tirati's 92s for their mould making. So I decided to get myself one, which I am really glad I did, because it has a great end shaped like a pallet knife which is really good for smoothing wet clay and getting a really good edge. I don't think I would have been able to get the results I did without it.
Silicone Negative Mould for Core
I have limited knowledge and experience with 3481 moulding silicone, what I have learnt has been from watching and questioning the previous year whilst they were in the workshop, and also from working at the Ministry of Masks over summer, however this is the first project I have used it myself.
The Ministry of Masks purchased their silicone from Tomps supplies. I had never heard of them before, but it worked well.
I also noticed that both the Ministry of Masks and Stuart bray did not build a wall with locking points around their sculpts/ cores. So it deems that it is not a necessary step, however I know that pours easily, so I would always do that with my moulds.
For this project I decided to research into PS Composites 3841 Silicone a bit more, since I also needed to order some other things from their I decided it may be better than ordering from Tomps, and even mould life, especially because of the order limit from the latter company.


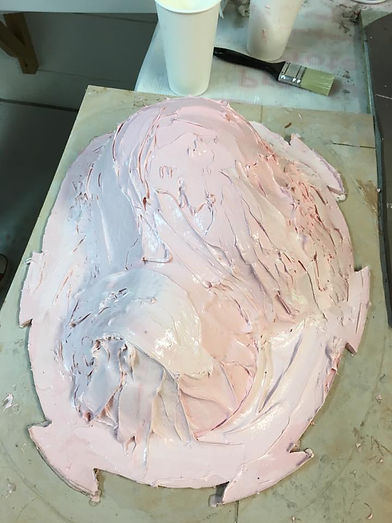


Thixotropic Layer


Plaster Jacket


First Core Attempt


Second Core Attempt


Third Core Attempt

To remove the large undercuts ready to moulding. Stuart uses Wet clay around the edges of the cast.
When you look down onto the cast from above, you should be able to see all the surface, like this.
KEYS- surrounding the cast at variable points. using the same wet clay. Note the shape, with the edges sculpted inwards. so that these don't create locking points.


Step 5
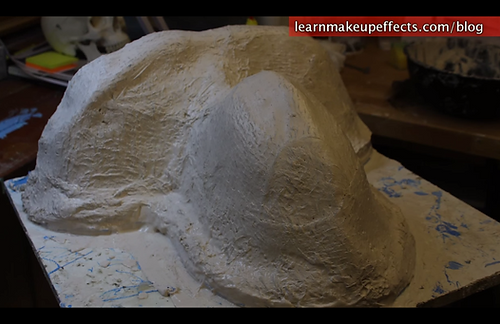
The jacket- in this makeup Stuart uses plaster and scrim for the jacket. The scrim gives the plaster strength so it will not crack.
Plaster Jackets are quick to do, and take about half an hour/ hour to cure. before you can de-mould the cast.
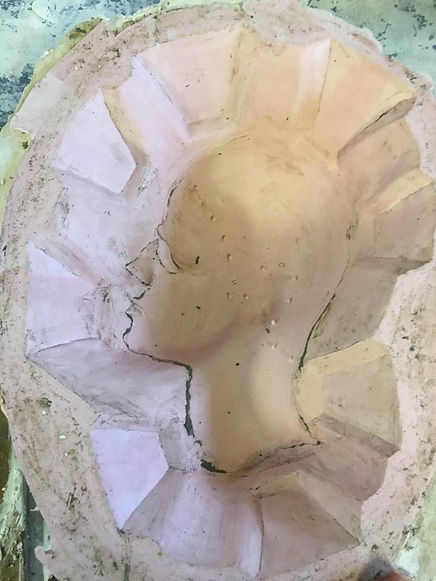
Below is the result. You can see the clean negative of the cast, works so well because of the lack of undercuts.
Step 6
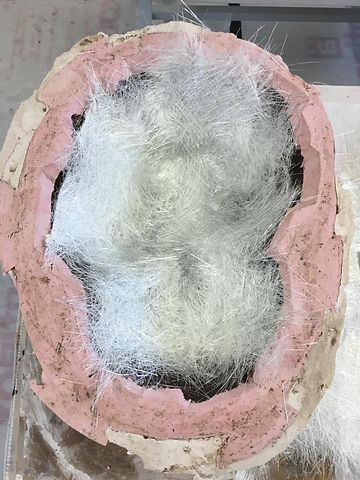
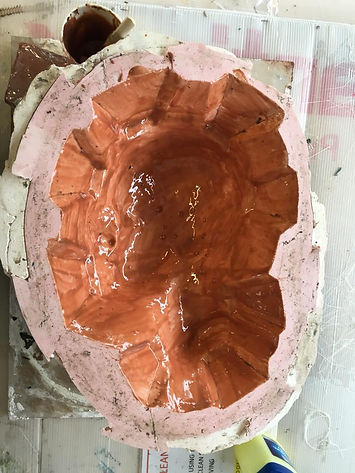
The fibreglass core.
When doing this, the mould should be secured, if there is not an even surface to balance it on, you can do has Stuart has, and use a clamp to secure it.
The you fibreglass straight into the moulds. There is no need to mould release when doing this, and you can use pigment to colour your core as Stuart has done. From the photos below it looks as though he has coloured the gel coat only and the lay up resin and matting layer is not pigmented. for this makeup Stuart has created 2 different cores from the same mould, the face and the neck, pictured below. If you make a study and good silicone mould, you should be able to make multiple cores from the same mould.
Step 7
For this makeup, Stuart made a core for the chin, using urethane resin, it is a quick process, and will create a snap mould. To do this Stuart, filled the nose with clay, tilted the head and filled it with resin. This cures in about an hour, so it is very quick to do, if you need to make a mall piece.
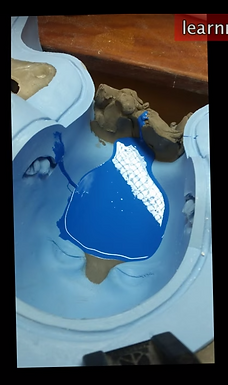
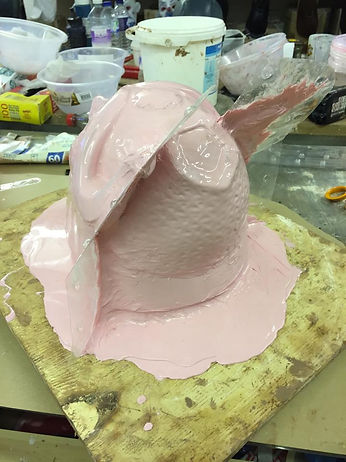
My Silcione Mould
For this mould i used PS Composites 3481 silicone.
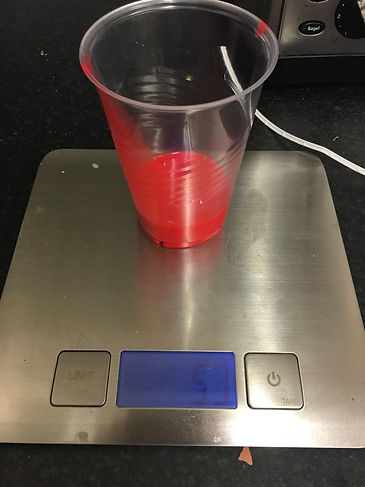
and the fast catalyst, which makes the silicone sure within 8 hours.
Use 10% of the catalyst.
For this mould i decided to copy Stuart Bray, and make a plaster jacket, there are a couple of reasons why.
1) it is a lot quicker than making a fibreglass mould,
2) its cheaper.
And it works just as well. However does not last as long as a fibreglass mould, so if you needed to create lots and lots of cores, or wanted to keep it you would need to take more care than with a fibreglass jacket.
By using a plaster jacket i could also build up a flat surface on the top for the jacket to sit on when turned upside down and fibreglassing.
This was the first time I had done this process, and i can say that it took longer than in thought, it was also extremely messy, unlike Progel silicone, the cure time is a lot longer, so if the silicone gets anywhere other than the mould, i.e on your hands it is very hard to clean.
Another thing I learnt is that you need more silicone than you think. for this mould I bought a 1Kg of silicone, and including the thixotropic layer I used it all, and could have done with a bit more.
Unfortunately I did not mix up enough on the first pour so I had to mix up a second amount and pour it over the top, there is nothing wrong with this, as silicone sticks to silicone, so the mould will still work, it is just that I used a little less catalyst and you can see the difference in colour on the mould.
So it will cure a little slower. This was not a problem as I left it cure overnight, but in industry this may have been. And I would prefer not to do this, as it makes my work less professional.
To create the thixotropic layer, use the 3481 silicone, with 10% catalyst and 1% thixo. For this I used up all the rest of my silicone, and for this mould i could have used a little more, but this worked.
I found this a lot less messy than the firt layer, and when using a wooden spatular to paste on the silicone, it is a lot easier.
Smoothing
This is a trick that i learnt when working at the Ministry of Masks, before the silicone is cured, use fairy liquid or hand soap and rub it over the silicone and it smooths out all the surface. This does not inhibit the cure of the silicone, and is not a necessary step but makes it a lot easier to create the jacket and also place the keys. It also makes your work more neat and look more professional.
Keys
To create these keys I used a ice cube tray, and I used the same silicone without the thixo, I created these at the same time as doing the first layer, so they cured within the same time as the silicone, so I could just stick them on the mould before the thixo layer cured.
It is important to place the keys evenly across the mould so that the jacket has something to grip onto all around the silicone.
Fig. 15.1
Fig. 15.23
Fig. 15.36
Fig. 15.49
Fig. 15.65
Fig. 15.66
Fig. 15.64
Fig. 15.63
Fig. 15.46
Fig. 15.34
Fig. 15.48
Fig. 15.51
Fig. 15.60
Fig. 15.61
Fig. 15.62
Fig. 15.57
Fig. 15.55
Fig. 15.58
Fig. 15.50
Fig. 15.54
Fig. 15.25
Fig. 15.38
Fig. 15.59
Fig. 15.47
Fig. 15.42
Fig. 15.44
Fig. 15.35
Fig. 15.29
Fig. 15.37
Fig. 15.56
Fig. 15.15
Fig. 15.33
Fig. 15.45
Fig. 15.52
Fig. 15.43
Fig. 15.40
Fig. 15.41
Fig. 15.1
Fig. 15.39
Fig. 15.30
Fig. 15.31
Fig. 15.26
Fig. 15.32
Fig. 15.28
Fig. 15.27
Fig. 15.16
Fig. 15.20
Fig. 15.24
Fig. 15.17
Fig. 15.22
Fig. 15.21
Fig. 15.18
Fig. 15.14
Fig. 15.19
Fig. 15.4
Fig. 15.11
Fig. 15.12
Fig. 15.7
Fig. 15.13
Fig. 15.9
Fig. 15.10
Fig. 15.2
Fig. 15.5
Fig. 15.6
Fig. 15.8
Fig. 15.3
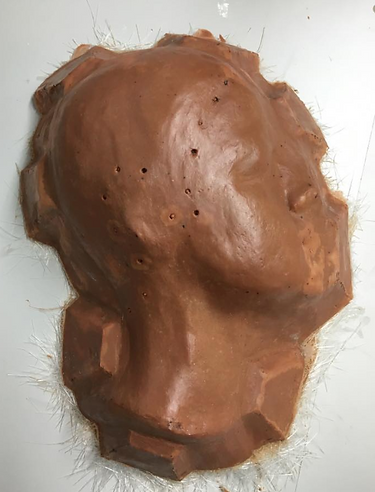
For the final core I created, I tried to perfect my technique and apply all the things I learnt previously in the process. This includes using the correct amount of pigment and colour in the gel goat layer.
Secondly I still wanted to use the Lifecast method for matting, as i want to perfect this technique if this is quicker and how they do it in industry.
To not get air trapped in the core, I spoke with Wayne who told me to brush the resin in the mould from the centre outwards, Like in Fig. 15.64.
As you can see in Fig.15.65 and Fig.15.66, this worked a lot better. And this time the core is strong, has no air bubbles and is the right colour for the clay.
I am really happy with how this core came out. Finally I used the vibrosaw to trim down all the edges to make it flat on the bottom, to have a stable surface to work on.
Below is the final mould and the inside of the jacket, so you can see where the keys fit the plaster, and the inside of the mould is not cleaned out yet, but you can still see where all the cast us with no undercuts.
This was the first time I had pigmented fibreglass, and it was a b of a disaster. I used brown pigment because I wanted to match the clay, but I didn't realise how dark it was, and also I over pigmented the gel coat a lot. This meant that it did not cure properly. As you can see in Fig. 15.56 it did not come out of the mould properly.
However I did not pigment the layup resin and matting, following Stuart Bray's technique. I had spoken to Sammy about her work fibre glassing with Life cast studios. Their technique is to lay in all the matting and then brush the lay up resin in to mould. Instead of brushing the resin onto the matting before laying it in the mould.
The process of this can be seen in Fig. 15.52 and Fig. 15.53.
This technique is a lot quicker than the way I was previously doing it. And providing you do it right, gets the same results. When I did this, I did the Life cast techniques for the first layer then continued with brushing it on and laying it in for 1 more layer. I think that this technique works well, however I can not really tell with this mould because of the gel coat mistake. It also was a bit thin, in the next core I will build up another fibreglass layer to strengthen it.
Fig. 15.53
For the second core I decided to do the gel coat properly. For this one I used a lot less pigment and bought in the clay I would use to sculpt to try and match the colour correctly. The colour needed, the red yellow, brown and white pigment to create the correct shade. And as you can see it was a lot more successful than the first try.
For this mould I did the same technique with the previous for the lay up resin and matting; the Life cast method.
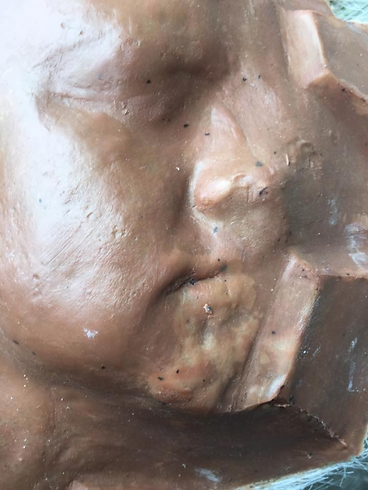
At the time of moulding I thought it worked well, however as you can see in Fig.15.60 and Fig. 15.61. There are air pockets in the core, from where air has been trapped in the first layer of lay up resin.
Process Evaluation
This process took longer than expected because of the mistakes I made, so this has given me warning to allow for more contingency time in the project, especially when moulding as this is where things can go technically wrong.
However I am glad that i took the time to practice this process as eventually i created a core that I can use and am proud of, and I believe i know how to do it well going into Major project.