Dixie George- Specialist Practice

Final Sculpt, Grounding and Moulding


Final Sculpt and Grounding
Moulding
Mould Release - Options


Before you fibreglass your mould onto your fibreglass head, you must mould release it, otherwise it will never come apart.
There are a couple of different methods for mould releasing Fibreglass.
1. Using a wax mould release like Honey Wax or Mirrorglaze. For this method, you must brush on the wax, and then wait for it to dry and buff it off until it is really shiny. This should be done 2 or 3 times, This is a good method but it is really long. In fig.24.9 and Fig. 24.10 you can see two examples of this product.


Fibreglassing


Gel Coat Layer


Matting Layers


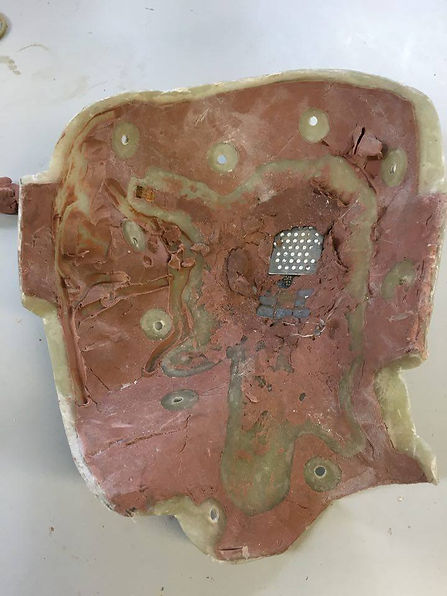

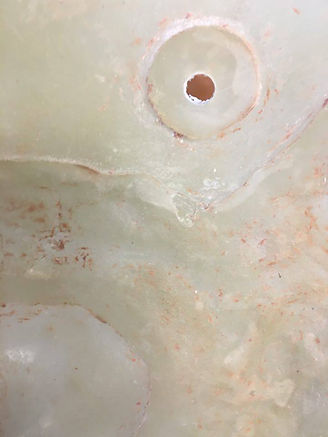


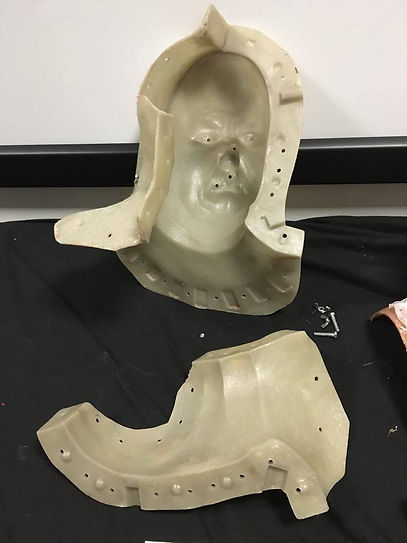
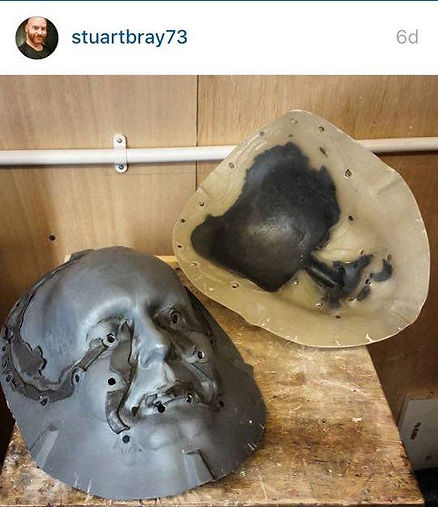


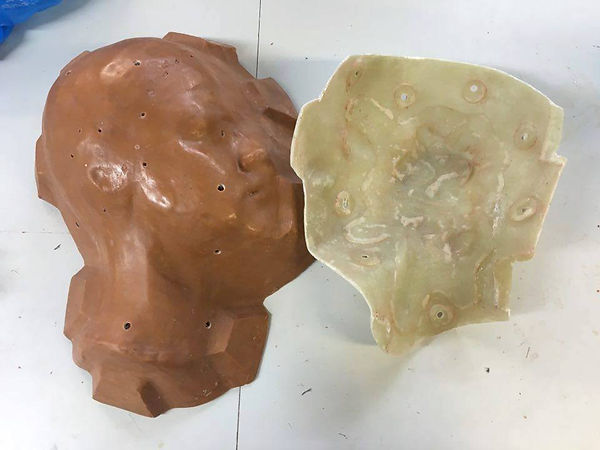


Fig. 24.1
Fig. 24.9
Fig. 24.19
Fig. 24.28
Fig. 24.37
Fig. 24.38
Fig. 24.39
Fig. 24.35
Fig. 24.34
Fig. 24.32
Fig. 24.29
Fig. 24.36
Fig. 24.33
Fig. 24.31
Fig. 24.30
Fig. 24.26
Fig. 24.25
Fig. 24.27
Fig. 24.23
Fig. 24.24
Fig. 24.21
Fig. 24.22
Fig. 24.20
Fig. 24.10
Fig. 24.17
Fig. 24.14
Fig. 24.18
Fig. 24.16
Fig. 24.8
Fig. 24.12
Fig. 24.15
Fig. 24.11
Fig. 24.13
Fig. 24.4
Fig. 24.3
Fig. 24.2
Fig. 24.7
Fig. 24.5
Fig. 24.6
Above is an example of the grounding from Stuart Bray in his UMAE 2015 makeup. I followed his steps for the casting my core, so I thought it necessary to follow his steps for grounding and moulding also. Noting on his mould, how far down he takes the grounding. There is a thin amount of clay right from the sculpt to the edge of the core. Noting how the keys on the core have been left without clay.
Below shows even more examples of grounding, and i think it is important to see how much space has been left between the sculpt and the grounding. the blending edge is only about 0.5cm thick.
Also some of the moulds below are squish moulds so they do not have any circular keys to drill the mould to the core.
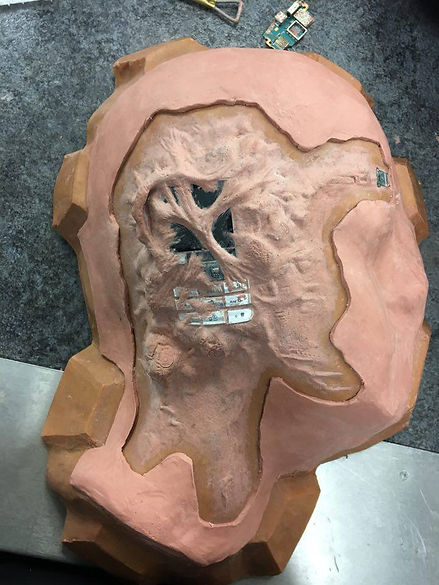
Below is my process for the grounding, to get the thin grounding I used a pasta roller, this process is a lot quicker than using a rolling pin or a clay extruder.
and for the keys, I used a 2pence piece to make them all even. I believe that I have enough keys on the core to get a good lock all the way around.
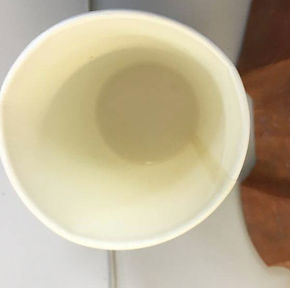
Another method is to use liquid wax. This mould release is a lot quicker than using wax, because you do not have to buff it off, you only have to brush it onto the fibreglass core, wait for the layer to dry and then do a second coat. This product can be seen in Fig. 24.11
The Last method is using PVA Release agent. This can be seen in Fig. 24.12 and an example of someone using it in Fig. 24.13. This release is popular for releasing clay walls when fibre glassing because it locks in the moisture of the clay. I have not seen it being used on the fibreglass core before, so i am sceptical about using it.
For my mould release I decided to use the liquid wax release, Ben had some in the workshop so I did not have to purchase it. In Fig. 24.15 you can see where I have applied it in all the gaps of the grounding, you can see it is all shiny.
For this Fibreglass mould I used the same process i have in precious moulds, making sure the Gel coat covers all the sculpt and grounding. For this I used only 3% catalyst, although it is November when I am moulding I don’t think it is cold enough to warrant a any higher percentage of catalyst and so a hot cure.
The main issue I have with this sculpt is around the ear and under that edge, where could be weakness in the mould, so when doing the gel coat I made sure that the brush really got into all that detail. Then before doing the matting layer after the gel coat was tacky I used lay up resin and choppie strands of fibreglass in these areas, so there would be no air bubbles or problems here.
I want a strong but thin mould, from previous projects I have learnt that this comes with the matting rather than the resin. if you overload the fibreglass with resin it will be a weaker mould. Secondly from practicing this previously I found that I like working with moulds that are 2/3 layers thick best. So that’s what I did for this mould.
From problems with the core, I took extra care when making this mould to brush any trapped air out from the centre.
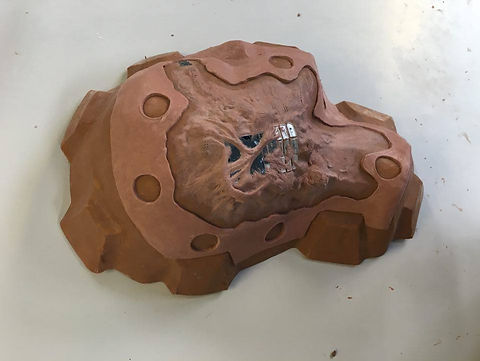
After the mould cured, I drilled holes through the keys, trimmed the mould with the vibrosaw and cleaned out my mould with fairy liquid and a toothbrush at first, and then with petroleum wax to get all the really small bits of clay out.
Problems
Although I tried my hardest to not have any trapped air in my mould, unfortunately there were still some air bubbles once the mould was cleaned out. This was particularly around the flashing. To fix these I mixed up a small amount of layup resin and carefully brushed it over any areas like the ones below, this is so that when it comes to casting the piece, it will not affect the encapsulator or silicone and won't cause any problems. This could also have been done with car body filler.
in order to eliminate this problem in moulding, next time I will apply a mud layer, (lay up resin and talc) on my mould, particularly around the flashing.
Below are some examples of really neat fibreglass moulds, the first in Fig. 24.28 from Neil Gorton and his Prosthetics Event makeup. And below some Examples From Stuart Bray in his Prosthetic Event Makeup. I aim for my moulds to be as neat as this one day. There are almost no air pockets, and they are the same thickness all the way around, with sanded edges and even drill points.
Process Evaluation
Below are the images of my final mould, because the mould is pretty simple, I believe that this process didn’t push my moulding skills from level 5. However it is what was needed for the project, and I believe it has allowed me to practice the process well, and get a mould I am proud of and think is quite neat.