Make-up Exploration
What is Foam Latex-
It is a very soft, lightweight, spongy material used to create prosthetics. An actor's physical expressions are very easy to project through foam latex. Liquid latex is mixed with various additives and whipped into foam, then poured or injected into a mold before being placed in an oven to cure. In addition to prosthetic appliances, foam latex is also used to make rubber body suits and skins for animatronic characters.
Hot Foam - Hot foam latex is a foam latex that is whipped up, poured into our moulds, assembled with a face core and then placed in an oven to bake for a few hours.
Cold Foam- Soft or rigid two-part uruthane foam that does not require the application of heat to cure.
Advantages of Using Foam Latex
-Its weight: Foam Latex is lighter than silicone and other materials which makes it a good material to use when fabricating large pieces and monster suits.
however it is completely opaque, so may give a less lifelike appearance on face pieces.
Bleeder- An escape hole for air trapped inside a mold; it fills with excess casting materials the mould is filled.


Foam Latex Components
Foam Latex Health and Safety Rules
- Always wear gloves when working with foam latex, disposible latex or vinyl gloves are good.
- You should wear a respirator, like the one used for fibreglassing.
- Wear appropriate clothing, a disposible paper overall is good for this.
- Never eat, drink or smoke in the foam latex studio. This may contaminate the mix and it is unpleasant to consume the foam latex fumes.
- When using Foam Latex, make sure that there is plenty of ventilation. It is best to work with ventilation fans and extractors rather than with open windows because the tempurature will effect the curation, and the elements may affect the mix.
- Store Components in a cool dry place, off the floor. away from sunlight. Try to avoid ordering foam latex kits in winter, best to get them between the months of March and November if possible.
Foam Latex Tricks and Tips
- Label the brushes you use. Do not use the same brush for the foam latex as you did for the Mould release.

Hercules (2014)
Horse Head Made for Krystian Mallett.


Wrath of Titans (2012)
Minotaur's face for Neal Scanlan
Wrath of Titans (2012)
Minotaur's hand for Neal Scanlan
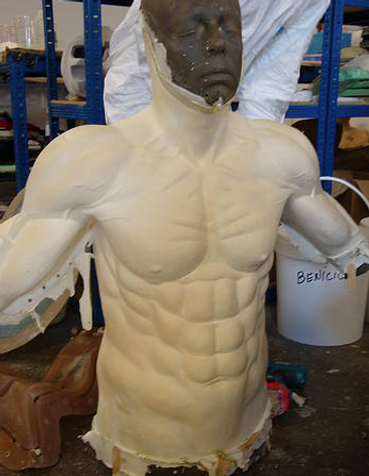
The Wolfman (2010)
Wearwolf's Torso for Millenium FX.
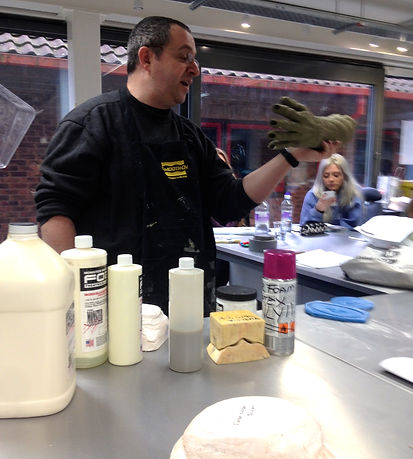
Foam Latex with Gilles Paillet
Release Agent - Mould release – Zinc Stearate
Pearly foam brushed in plaster moulds (or on any porous material). Temporarely seals the
porous surface of the mould. Leaves a residue on the mould that needs to be dusted out.
Can be used on fiberglass moulds when damaged, to avoid the foam to grab onto cracks and
such on flanges. No need to use it on details.

High solid latex foam base
Creamed latex, different from liquid latex. White-ish colour, slightly thick, with a strong
smell of ammonia. It’s the main component of foam latex.
Lasts about 6 months after first use.
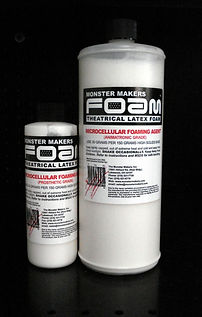

Foaming Agent
Thick and viscous liquid, mainly composed of castor oil (soap) and water. That will help
your foam to reach the volume you want when whisked.
The amount of foaming agent to add to your mix is 20% of the amount of the latex base.

Method
Suppliers
Ratio of components
Latex Foam Base : 100%
Foaming Agent : 20%
Curing Agent : 10%
Gelling agent percentage varies depending on different factors; the temperature on the surrounding area, the humidity of the room and the refining time. It usually is between 10 and 14 % of the amount of latex base, but could be less if the room temperature is higher than 20°C, more if the room temperature is lower than 20°C
Step 1
Preparing the Mould
Mould Release.
- on porous moulds (like plaster) use the zinc stearate mould release. (cover both the negative mould and the face cast in 2-3 thin layers.)
- on harder resin moulds (like fibreglass) there is no need to use mould release. instead you need to use a spray glue such as spraymount tm this is so the foam sticks to the mould and gets a true fcopy of the form and texture.
(Never use vaseline as a mould release with foam latex, because it will break down the latex.


Gelling Agent
Grey liquid. It helps set the batch of foam. The foam goes from a ‘shaving foam’ state to a
‘compact’, ‘solid’ state, prior to be put in the oven.
Curing Agent
Yellow-ish liquid, sulfur-based. It gives your foam its memory (the foam comes back to
shape when pressed) and elasticity.
The amount of curing agent to add to your mix is 10% of the amount of the latex base.
Plaster Moulds - when using plaster moulds or other porous material you must wait for them to cool down before taking them out of the oven after baking otherwise they could crack.
Resin- such as Fibreglass moulds, epoxy resin moulds, synthetic plaster moulds.
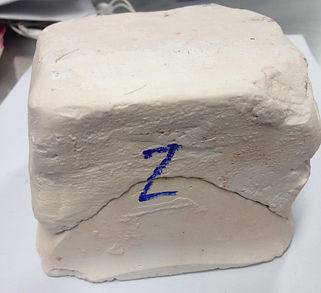
Marking moulds
This step doesn't afftect the foam, but is a good practice and makes sure the mould is placed together properly.
Reinforcing Foam Latex


With Power Netting
-
To reinforce foam latex with Netting, you spray mount the netting onto the postive cast/ core.
-
Power netting adds strength, resistace but still gives slight movement, because it is moveable in 4 directions, up, down, left and right.
Reinforcing Foam Latex is not always necessary, it is mainly used with suits, and anamatronic puppets, in order to make them last longer.
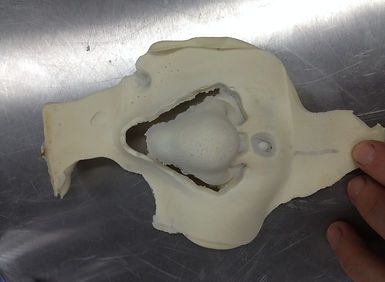
Seletive Reinforcment with Latex
-
To reinforce selected areas in prosthetics, such as the palm of the hands on a monster suit. you can paint liquid cream latex layers to the inside of the mould in selected areas letting it dry before filling the rest of the mould with foam latex.
You can see this technique in the photo to the right.
Other materials that can be used to reinforce foam latex include; Lycra fabric tights, or fishnet fabric. Synthetic netting made with plastic should be avoided because it may melt in the oven.

Step 2:
Mixing the Foam
• Electronic scale.
• Multiple-speed Mixer with whisk attachment and a big bowl.
• Oven dedicated for the baking of foam latex (do not use the one in the kitchen, the products you use are toxic).
• Thermometer and hygrometer.
• Stop-watch.
• Notepad and pen.
• Disposable cups (for the gelling agent).
• Gloves, respirator, goggles, paper suit, etc.
• Cheap disposable brushes (One inch, Two inches brushes), and/or injection gun (big
syringe).
Pre-Colouring Foam Latex


Injecting Foam Latex
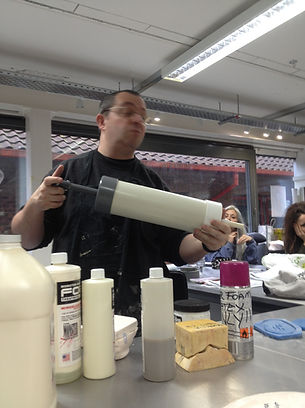


Injecting Foam Latex into moulds is arguably the best way to fill a mould, and in industry when you have the time and budget it is expected.
To inject the mould you need to use an 'Injecting Gun' like the one below.
-
Before using the foam latex, each component must be mixed well since when not in use they settle and separate.
-
the minimum you can really mix at one time is 150g because the whisk on the bowl doesnt really reach below that.


Building a temporary Foam Latex Oven
Building a temporary foam Latex oven can be very cheap and is a good idea if you do not have a lot of room to run pieces in.
it isgreat for a garage or somewhere you can work outside and then collapse the oven and store it.
All you need is
- a large wooden board,
-
Washing Foam Latex


Applying Foam Latex Prosthetics
Painting Foam Latex (Flesh Tones)

Monster Makers Latex- all high solids, RDN407 formula.
best latex in Casey Love opinion. less shrinkage,
other latex have more synthetic materials in them and feel like plastic where monster makers latex feels like rubber.
It is a great idea to pre colour foam latex, especially when it comes to working with it on set, if it tears or rips, it can be much more easily patched up and fixed if the colour on the inside isn't so drastically different from the paitn job, and it isnt so obvious to the eye that there is damage.

Bondo- A mixture of Pros-aide water based acrylic adhesive, and Cab-O-Sil (fumed Silica) to create a paste used to blend seams and edges of prosthetics.
Fumed Silica- Silicon Dioxide has unique properties and is commonly added to liquids or coatings and solids to improve various properties. Fumed Silica is used frequently as a thixotropic additive that, when dispersed into liquids, increases viscosity; when mixed with powders it prevents caking. Cab[O-Sil is fumed Silica.


Fig. 95
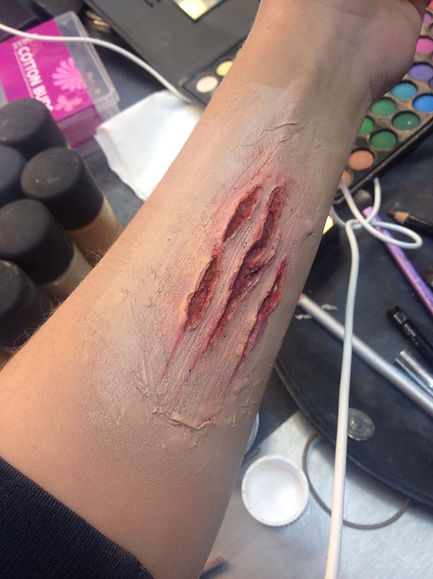
Painting piece with Skin illustrator and greaspaints
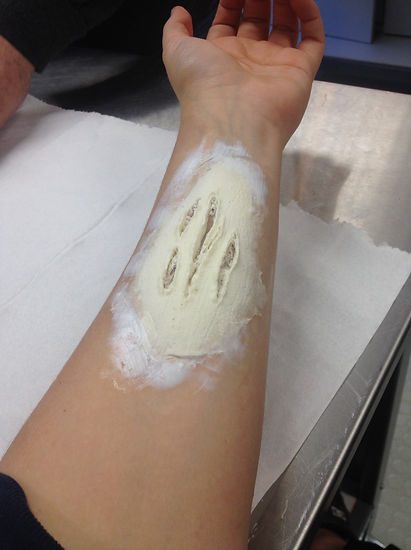
When applying foam late applyances on skin you can use skin illustrators with foundations and greasepaints.
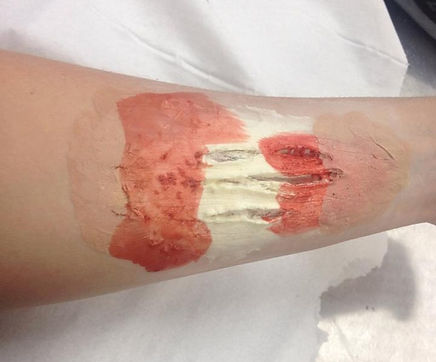
However you need to seal the piece first because the foam latex will act like a sponge and absorb the paint otherwise.
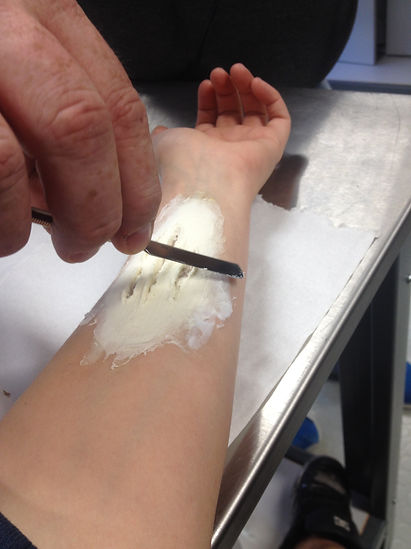
In order to seal it you can use a think layer of prosaide sponged all over the piece. or a prosthetics sealer if you have one.
then you can begin painting. In order to make the piece look transluscent you should try to create an underlayer of red paint skin illustrator to act like blood and capillaries under the skin.
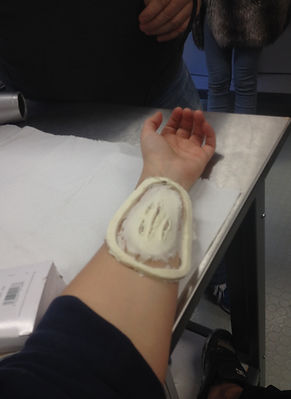
then you can go in over the top annd match the skin colour with your skin tone. then if necessary overpaint veins and freckles to add realism.
Then of course you can use bloods, and greastpaints in the wound such as below.
I'm not sure thiat this piece shoows the best you can do with foam latex. for a piece like this i would use silicone. and the flesh tones are a little light around the edges but i think it is not totally disastorous. and sort of works.
MAIN POINTS FROM ARTICLE
-
When blending edges of Foam Latex pieces you can use IPA to help blend into the skin.
-
give the whole piece a coat/seal with pros-aide to stop absorbsion of paint.
-
Powder after this step as the pros-aide will remaiin sticky.
Using PAX Paints with Foam Latex
-
build it up in thin layers.
-
the first one should be like a wash, and you should blend it to about 5cm into the skin so the transition is smooth.
-
do not dump the paint onto the appliance thickly.
-
another reason to build it up in layers is so that you can step back and look at it between layers, because PAX paint is not very easy to get off, once you have gone too heavy it won't come off.
-
you can look back at it and decide which wash layer to go in with next. ie. is the piece too yellow? or too red?
once all the pax paint is applied you can coat the piece with skin illustrator and then finally powder the paint job because otherwise it will remain sticky.
Fig. 96
Fig. 111
Fig. 128
Fig. 140
Fig. 141
Fig. 142
Fig. 139
Fig. 138
Fig. 137
Fig. 136
Fig. 135
Fig. 132
Fig. 133
Fig. 134
Fig. 130
Fig. 121
Fig. 110
Fig. 127
Fig. 124
Fig. 114
Fig. 131
Fig. 129
Fig. 126
Fig. 125
Fig. 123
Fig. 122
Fig. 120
Fig. 119
Fig. 118
Fig. 117
Fig. 115
Fig. 116
Fig. 112
Fig. 109
Fig. 113
Fig. 108
Fig. 97
Fig. 98
Fig. 99
Fig. 107
Fig. 103
Fig. 104
Fig. 101
Fig. 98
Fig. 102
Fig. 100
Fig. 105
Fig. 106
Types of Moulds you can run Foam Latex in
- Plaster moulds
-Silicone Moulds (but after this you can not run any other material in in only foam latex)
- Fast Cast/ polyeurothane resin
- fibreglass / polyester resin
Baking the Foam Latex
The oven temperature should be between 70-85 degrees celcius.
When using a plaster mould you have to let the mould cool in the over before taking it out otherwise it may crack.
Before you apply the foam latex onto skin you have to wash it out because of the chemicals within the material.
To wash the latex, you need to soak it in some water and washing up liquid for a few minuts and then run it under the tap until it goes clear, and then once it is dry it can be applied.